
I’ve been writing and focusing on Python lately and I’ve been wanting to make more content about Ruby. Ruby was my very first language and the one that got me into this programming world.
For this entry I’m going to write how to create, test and publish our gem to RubyGems.org to make it available for everyone, and in future entries we’re going to see how to setup a CI/CD for automatic testing and deployment, Behavior Driven Testing with Cucumber/Aruba and Code Coverage with SimpleCov.
Let’s start with the basics. You can skip the basics clicking here
What’s a ruby gem?
A ruby gem is a piece of code that you can integrate to your software (made in ruby) to help you achieve some tasks more easily. Think of it as a library, because that’s exactly what it is!
An example of this would be requiring a gem that can make http requests for us. One gem (read library) that can perform this would be httparty.
irb(main):001:0> require 'httparty'
=> true
irb(main):002:0> response = HTTParty.get('https://google.com')
irb(main):003:0> response.header
=> #<Net::HTTPOK 200 OK readbody=true>
Another good example is the gem Clipboard that allow us to copy, paste and clear the clipboard on Linux, MacOS and Windows.
irb(main):001:0> require 'clipboard'
=> true
irb(main):002:0> Clipboard.copy('Hello world!')
=> "Hello world!"
irb(main):003:0> Clipboard.paste
=> "Hello world!"
irb(main):004:0> Clipboard.clear
=> ""
How to install a gem
Installing a gem is pretty straight forward, we can do this with the gem command line application provided by RubyGems, you shouldn’t worry about installing it as it comes bundled with Ruby since version 1.9:
$ gem install _gem_name_here_
To install the Clipboard gem, then we can install it like this.
$ gem install clipboard
The end users that are going to use our gem will also install our gem (or library) like this.
Dependency issues
There’s only one issue with this implementation, and that is when you have two pieces of code that requires different versions of (let’s say) Clipboard. For example, SoftwareA requires the Clipboard gem version 0.5.8, and SoftwareB requires the version 1.1.2 of the same gem and it brings breaking changes as it is not backwards compatible with the previous versions of the gem.
SoftwareA was installed first, so you have the Clipboard version 0.5.8 but as soon as you install the SoftwareB using the gem command line, it proceeds to install Clipboard’s newest version, which would be 1.1.2.
As this new version brings breaking changes and it’s not backwards compatible with previous versions, due to refactoring, renamed functions/method/classes, etc. It becomes pretty obvious that SoftwareA won’t work.
You reinstall the previous version of Clipboard 0.5.8 and it works now! But guess what, SoftwareB just broke. Welcome to the Dependency Hell.
Bundler comes to the rescue
To resolve this issue, we need a sort of isolated environment where we can develop or deploy our software without meddling with the version numbers of our dependencies in our other projects ourselves.
Bundler was designed with this idea in mind, where you can build your own library or app without affecting the version numbers in your multiple projects. If you’re familiar with virtualenv, venv, pipenv or poetry in Python, then you’ll get the hang of it in no time.
To install bundler we follow the same procedure when installing any other gem.
gem install bundler
After that, we’re able to use bundler with any application to install its requirements, for this we can go to the project folder and create a gemfile (or gemspec sometimes) and create a Gemfile.
Require gems in your Gemfile
This Gemfile will contain the other libraries that we’re going to use to make our gem work. For this example we’re going to create a folder to hold a new project and then we’re creating a Gemfile to hold our dependencies.
$ mkdir mygem
$ cd mygem
$ touch Gemfile
Now we have a Gemfile in our directory mygem, let’s fill it with a gem that we’re going to require to build our command line interface, this gem is Thor.
# Gemfile
source "https://rubygems.org"
gem 'thor', '~> 0.20'
What’s happening here? Well, the first line is going to tell Bundler that we’re going to require our gems from the server rubygems.org. The second line is telling Bundler to install the gem Thor.
But what’s that ~> doing there? It’s basically a way of saying “I want the highest version of thor between the range of >= 0.20 and < 1.0. This translates to the highest version of thor available since 0.20 but less than 1.0.
This is called the Ruby’s Pessimistic Operator, the twiddle-wakka or the spermy operator if you prefer it that way.
Now that we have defined our requirements we can fetch the lastest gem versions available for us using the update command in Bundler.
$ bundle update
Fetching gem metadata from https://rubygems.org/.
Resolving dependencies...
Using bundler 1.16.4
Fetching thor 0.20.0
Installing thor 0.20.0
Bundle updated!
Now, that we have fetch the latest versions (within our version constrain define in the Gemfile, of course) we can proceed to install them using the install command.
$ bundle install
Using bundler 1.16.4
Using thor 0.20.0
Bundle complete! 1 Gemfile dependency, 2 gems now installed.
Use `bundle info [gemname]` to see where a bundled gem is installed
This will generate a Gemfile.lock file that will pin our gem versions.
GEM
  remote: https://rubygems.org/
  specs:
    thor (0.20.0)

PLATFORMS
  ruby

DEPENDENCIES
  thor (~> 0.20)

BUNDLED WITH
   1.16.4
You can see here that there’s specifications about the version numbers of our dependencies, platforms, the remote server where we’re going to retrieve our gems and the bundler version.
Now we’re able to use the thor gem in our library. To our surprise, this gem comes also with a command line interface (CLI) that we can use.
To execute it, we have to do it under the environment that bundler has prepared for us. We can execute it using the exec command in bundler.
$ bundle exec thor
Commands:
  thor help [COMMAND]  # Describe available commands or one specific command
  thor install NAME    # Install an optionally named Thor file into your system commands
  thor installed       # List the installed Thor modules and commands
  thor list [SEARCH]   # List the available thor commands (--substring means .*SEARCH)
  thor uninstall NAME  # Uninstall a named Thor module
  thor update NAME     # Update a Thor file from its original location
  thor version         # Show Thor version
Awesome! Now we know how to define requirements and versions constrains within our application’s project, we can go and create a directory structure for our gem. But beware, developing gems is a bit different than developing applications with Ruby.
Creating our project
Project description
What we’re going to create is a gem with a command line interface called DiceMyPass (or DMP, from now on). This gem will provide you with a secure passphrase extracted from EFF’s long wordlist with an optional length. For example:
$ dmp gen
- Passphrase: slashed uncharted evoke placard outweigh revision
Additionally, we’re going to add an option to our gen (read generate) command that will check if our newly generated passphrase was found on a dataset on HIBP to check if its vulnerable. For example:
$ dmp gen --hibp
- Passphrase: rockstar brunt stunt remindful astronaut bats
- Password was not found in a dataset.
And lastly, we’re going to add a option to copy the new passphrase to the clipboard with the flag --clipboard.
Creating a gem with bundler
Now we’re going to get our hands dirty, you might think that we will have to create a directory structure and a Gemfile for our Ruby gem DMP, fortunately bundler got things covered for us and is able to scaffold one for us.
Allow bundler to create a scaffold of your project using the gem command in bundler. It’s going to ask you a couple of questions, they’re all important but when it asks you about testing then you should write minitest, which is a gem that will help us to test the functionality of our gem.
$ bundler gem dmp
Creating gem 'dmp'...
MIT License enabled in config
Code of conduct enabled in config
      create  dmp/Gemfile
      create  dmp/lib/dmp.rb
      create  dmp/lib/dmp/version.rb
      create  dmp/dmp.gemspec
      create  dmp/Rakefile
      create  dmp/README.md
      create  dmp/bin/console
      create  dmp/bin/setup
      create  dmp/.gitignore
      create  dmp/.travis.yml
      create  dmp/test/test_helper.rb
      create  dmp/test/dmp_test.rb
      create  dmp/LICENSE.txt
      create  dmp/CODE_OF_CONDUCT.md
Initializing git repo in /home/franccesco/workspace/dmp
Gem 'dmp' was successfully created.
This will generate a directory structure and there’s a couple of files that requires your attention.
| File | Description |
|---|---|
| Gemfile | Gemfile holding our application dependencies |
| dmp.gemspec | Gemspec holding our gem dependencies |
| Rakefile | Rake commands to handle our build cycle |
| CODE_OF_CONDUCT.md | Code of Conduct to let people know how to contribute |
| LICENSE.txt | License your project under the MIT license |
| .gitignore | List of files excluded from version control (git) |
| lib/dmp.rb | The file where we’re going to develop our gem |
| lib/dmp/version.rb | Here we’re going to bump the version number of our gem |
Obviously, there are others that are also important, but we’re going to see them in other posts.
Now, we have to define the dependencies of our project, but hold on, we’re not using the Gemfile to define our dependencies in our gem, we’re using the .gemspec here.
This is because there’s a difference between developing a gem and developing an application. I’m not going through the details about the differences, you can find that in this excellent article made by Yehuda Katz.
To make it easier for you, just remember:
- When developing an app: Use the Gemfile.
- When developing a gem: Use the gemspec.
Let’s open up our gemspec and fill it with the necessary information, remember to replace the TODO’s with relevant information.
lib = File.expand_path("../lib", __FILE__)
$LOAD_PATH.unshift(lib) unless $LOAD_PATH.include?(lib)
require "dmp/version"

Gem::Specification.new do |spec|
  spec.name          = "dmp"
  spec.version       = Dmp::VERSION
  spec.authors       = ["Franccesco Orozco"]
  spec.email         = ["[email protected]"]

  spec.summary       = %q{Generate a secure passphrase.}
  spec.description   = %q{Generates a passphrase using EFF's long wordlist.}
  spec.homepage      = "https://github.com/franccesco/dmp"
  spec.license       = "MIT"

  # Specify which files should be added to the gem when it is released.
  # The `git ls-files -z` loads the files in the RubyGem that have been added into git.
  spec.files         = Dir.chdir(File.expand_path('..', __FILE__)) do
    `git ls-files -z`.split("\x0").reject { |f| f.match(%r{^(test|spec|features)/}) }
  end
  spec.bindir        = "exe"
  spec.executables   = spec.files.grep(%r{^exe/}) { |f| File.basename(f) }
  spec.require_paths = ["lib"]

  # add dependencies
  spec.add_dependency 'thor', '~> 0'
  spec.add_dependency 'colorize', '~> 0.8'
  spec.add_dependency 'clipboard', '~> 1.1'

  # add dependencies specially for development needs
  spec.add_development_dependency "bundler", "~> 1.16"
  spec.add_development_dependency "rake", "~> 10.0"
  spec.add_development_dependency "irb", "~> 1.0.0"
  spec.add_development_dependency "minitest", "~> 5.0"
  spec.add_development_dependency "minitest-reporters", "~> 1.3"
end
As you can see, we have define our dependencies. Thor to handle our command line interface, Colorize to print colored strings to the command line, and Clipboard to copy the output to our clipboard automatically.
For our development dependencies we have added minitest-reporters which displays a nice report of our tests right in the command line.
As you can see, they all have version constrains to avoid that our gem breaks when the dependencies are updated with major versions and incompatible changes. Let’s install our dependencies.
$ bundle update
Fetching gem metadata from https://rubygems.org/........
Resolving dependencies...
Using rake 10.5.0
Using ansi 1.5.0
Using builder 3.2.3
Using bundler 1.16.4
Using clipboard 1.1.2
Using colorize 0.8.1
Using thor 0.20.0
Using dmp 0.1.0 from source at `.`
Using minitest 5.11.3
Using ruby-progressbar 1.10.0
Using minitest-reporters 1.3.4
Bundle updated!
$ bundle install
Using rake 10.5.0
Using ansi 1.5.0
Using builder 3.2.3
Using bundler 1.16.4
Using clipboard 1.1.2
Using colorize 0.8.1
Using thor 0.20.0
Using dmp 0.1.0 from source at `.`
Using minitest 5.11.3
Using ruby-progressbar 1.10.0
Using minitest-reporters 1.3.4
Bundle complete! 5 Gemfile dependencies, 11 gems now installed.
Use `bundle info [gemname]` to see where a bundled gem is installed.
There you go, we have now installed our dependencies, and if you look closely, we have also installed our gem in development mode.
Using dmp 0.1.0 from source at `.`
After we have updated and installed our dependencies, it is important that we exclude the newly generated Gemfile.lock from version control, as we’re developing a gem, not an application, and we’re not trying to replicate our environment in another one.
$ echo Gemfile.lock >> .gitignore
Now that we have excluded the lock file, let’s make a simple test before making our first commit.
Open up test/dmp_test.rb and let’s fill it with the following content.
require "test_helper"
require 'dmp'

class DmpTest < Minitest::Test
  def test_that_it_has_a_version_number
    refute_nil ::Dmp::VERSION
  end

  def test_say_hi
    assert_equal Dmp.say_hi('Franccesco'), 'Hello, Franccesco!'
  end
end
Now, we can see that we have 2 tests here. The first one test if our module has a VERSION number and if it doesn’t have this constant in our module then it should complain. We can check this out in the dmp module.
module Dmp
  VERSION = "0.1.0"
end
Now for the other one, we have written a test that checks that the result of our module function say_hi('Franccesco') returns Hello, Franccesco!. As we haven’t written any modules yet, it will fail. Let’s respect the red, green, refactor cycle and let’s make it fail.
For this, let’s run rake test to begin our minitests.
$ bundle exec rake test
  1) Error:
DmpTest#test_say_hi:
NoMethodError: undefined method `say_hi' for Dmp:Module
    /home/franccesco/dmp/test/dmp_test.rb:10:in `test_say_hi'

2 runs, 1 assertions, 0 failures, 1 errors, 0 skips
Minitest complains that it cannot find the method say_hi, this is because we haven’t created our module yet. Let’s create it right now on lib/dmp.rb to make it pass.
# lib/dmp.rb
require "dmp/version"

module Dmp
  def self.say_hi(name)
    "Hello, #{name}!"
  end
end
There you go! We have written a simple module that takes a name as a parameter and returns a salute with your name of choice. Let’s run the test again.
$ bundle exec rake test
# Running:

..

Finished in 0.000661s, 3027.9266 runs/s, 3027.9266 assertions/s.

2 runs, 2 assertions, 0 failures, 0 errors, 0 skips
All good now! Our module returns no failures now, meaning that our module successfully returns a salute with our name. Now, our tests are fine, but we can make our minitest report more friendly!
Friendlier reports with minitest-reports
Our red-green-refactor cycle is not showing neither red or green yet, so let’s add that to our environment. We can modify the behavior and presentation of our test opening the test helper found in test/test_helper.rb.
Just before, we added a development dependency in our gemspec, a gem called minitest-reporters which modifies the presentation in our reports, open test/test_helper.rb and spin up the minitest-reporter gem.
$LOAD_PATH.unshift File.expand_path("../../lib", __FILE__)
require "dmp"
require "minitest/autorun"

# add default progress bar to reports
require 'minitest/reporters'

Minitest::Reporters.use!
This will use the default progress bar reporter when we run our test. To try it out, let’s open up lib/dmp.rb and modify our code to make it fail.
require "dmp/version"

module Dmp
  def self.say_hi(name)
    "Hello, Palmer!"
  end
end
We now that our test is expecting to return another name, the one that we provide, but it will return Palmer instead, this way our test should represent a failed test with a red progress bar.
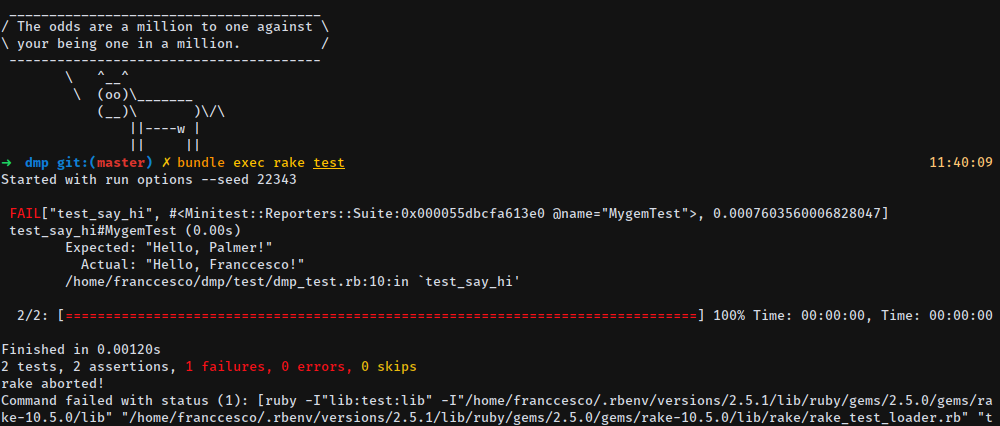
There we go! this step is not entirely necessary for the development of our projects but it’s surely a nice addition as it adds visual aid and also makes testing a lot more enjoyable for sure. Let’s make the test pass, shall we?
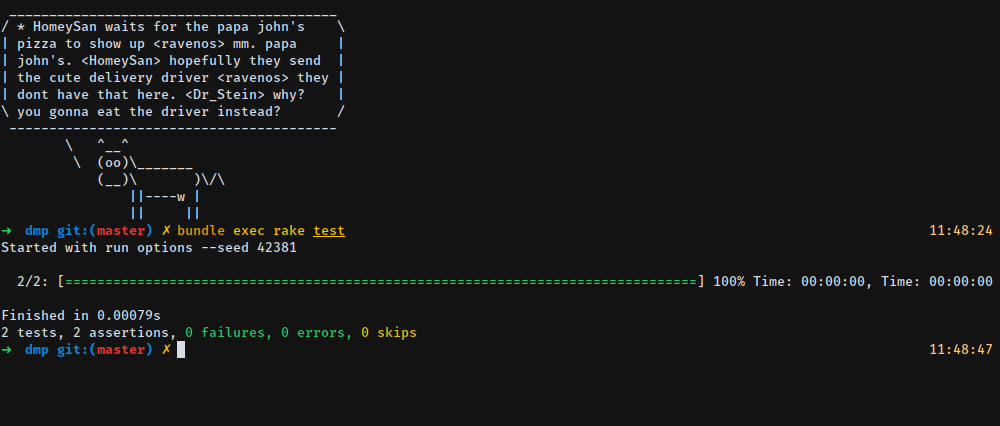
Let’s fix our method say_hi so it returns our name instead of Palmer, you know how to do that ;). After that, our test should be green now.
Great! Now that we have setup our minitests correctly, we can move on and make a more robust test, one that actually will test the functionality of our project, but before we write those tests, it would be useful to explain how the HaveIBeenPwned API works.
HaveIBeenPwned API
In order to write the test, we have to learn how the HaveIBeenPwned API works first, and it is actually not difficult at all. As we only need to access a certain function of the API, we don’t need to learn every aspect of the API itself, only the one to check if our password is vulnerable.
You can find the documentation of this aspect of the API clicking here, but let me give you an overview of how it works and what kind of requests we can submit.
Let’s say that our password is ‘passw0rd’, but if we want to check this password through the API, we cannot submit the password in clear text as this would be an insecure practice. Instead we have to submit a partial hash encoded in SHA-1 which are the first 5 characters of the hash and then submit it to:
https://api.pwnedpasswords.com/range/{first 5 hash chars}
This will return a list of suffixes of all the hashes that matches the first 5 characters of our hash, followed by a count of how many that hash was found in vulnerable datasets. Here are the simplified steps:
- We encode our ‘passw0rd’ string to SHA-1 which would be
7C6A61C68EF8B9B6B061B28C348BC1ED7921CB53 - We submit the first 5 characters of our hash
7C6A6to the API, which would be https://api.pwnedpasswords.com/range/7C6A6 - It will return a long list of hashes, we only need to find the suffix of our hash, which would be
1C68EF8B9B6B061B28C348BC1ED7921CB53
Example:
# If the password is secure, we wouldn't be able
# to find the suffix of the hash here.
# This is clearly not the case.
-- SNIP --
1BC4E6F00BECB5998201277DC62F89E08B0:7
1BC5AF255E721AF1C4AA83FD0F8EE8A79B8:3
1C68EF8B9B6B061B28C348BC1ED7921CB53:216221 <<- Here
1CEA692E5FA3ED23B956839B4B8BFCCC5F5:4
1DC4A0F7305069370733B17882579EBDF4E:3
-- SNIP --
This method is called the K-Anonymity model, and as we can see, the password ‘passw0rd’ was found in 216221 datasets. This makes it obvious that this is not a secure password at all, so let’s implement this functionality into our code, shall we?
Generating a secure passphrase
As already stated in our project description, we’re going to create a single gem that generates a passphrase and also it checks if the generated password is a known vulnerable password.
Right now, we’re going to delete our previous say_hi test and we’re going to create three more empty tests that we will fill-out eventually. Here’s how the tests should look:
require "test_helper"
require 'dmp'

class DmpTest < Minitest::Test
  # def setup; end

  def test_that_it_has_a_version_number
    refute_nil ::Dmp::VERSION
  end

  # def test_gen_passphrase; end

  # def test_vulnerable_pass; end

  # def test_secure_pass; end
end
Now, we can see that we have three more tests and a setup method:
- First, we’re going to test if our module (dmp) generates a secure passphrase.
- We’re going to check if our generated passphrase is secure enough.
- Lastly, We’re going to test if our program alerts us if a password is vulnerable.
Let’s fill-out test_gen_passphrase first. As we know, when we create tests we create expectations. Following this idea, we’re going to define how our program should create our secure passphrase. Our “secure” passphrase for these tests will be “coding dose dot com” in the meantime.
def test_gen_passphrase
  # gen_passphrase should generate and respect prassphrase length
  passphrase3 = Dmp.gen_passphrase(3)
  passphrase_default = Dmp.gen_passphrase
  passphrase12 = Dmp.gen_passphrase(12)
  assert_equal passphrase3.length, 3, 'Passphrase length != 3'
  assert_equal passphrase_default.length, 7, 'Passphrase length != 7'
  assert_equal passphrase12.length, 12, 'Passphrase length != 12'
end
There’s a lot going on here, huh? No worries though, this is more of the same. Let’s analyze the first variable declaration and the first assertion:
# Here we generate a passphrase which will consist on three words
passphrase3 = Dmp.gen_passphrase(3)

-- SNIP --

# Now we check if the passphrase previously created has a length of three words.
assert_equal passphrase3.length, 3, 'Passphrase length != 3'
If the passphrase is not equal to three words then it complains with the message ‘Passphrase length != 3’. Let’s run this test.
NoMethodError: undefined method `gen_passphrase' for Dmp:Module
Our first expectation did not run correctly, but of course, this is what we’re looking for. So as there’s no method named gen_passphrase in our module yet, we’ll have to create it first. But before we do that, we’ll have to look for a dictionary that gives us a list of words which we’ll use to generate a passphrase consisting in 3, 4, 8, 100 words if we need to. You can find the list here: eff_long_wordlist.txt
Now, let’s save this file in lib/dmp/assets/eff_long_wordlist.txt.
$ mkdir lib/dmp/assets
$ wget -O lib/dmp/assets/eff_long_wordlist.txt https://raw.githubusercontent.com/franccesco/dmp/master/lib/dmp/assets/eff_long_wordlist.txt
Now that we have saved the dictionary in the assets folder, we can open up our module and code the core functionality of our gem, which is to generate a secure passphrase using this dictionary.
module Dmp
  # First we load the absolute path of our eff_long_wordlist.txt.
  @eff_wordlist = File.dirname(__FILE__) + '/dmp/assets/eff_long_wordlist.txt'

  # The default passphrase length should be 7
  def self.gen_passphrase(pass_length = 7)

    # Read filename eff_long_wordlist and save it as a list.
    wordlist = File.readlines(@eff_wordlist)

    # Strip the '\n' out of every line.
    wordlist.map(&:strip!)

    # Shuffle the list and return a list up to pass_length words
    # which in the case would be equal to 7 words.
    wordlist.shuffle[0...pass_length]
  end
end
This should be pretty easy:
- We create an instance variable holding the absolute path of our wordlist
- Define our method gen_passphrase with a default length of 7
- Load our wordlist as a list and hold it in the wordlist variable.
- Strip every ‘\n’ in each word
- Lastly, we scramble the words and return a list of words with our desired length.
Let’s test it out:
Started with run options --seed 2535

  2/2: [==========================================================================] 100% Time: 00:00:00, Time: 00:00:00

Finished in 0.01531s
2 tests, 4 assertions, 0 failures, 0 errors, 0 skips
Awesome! Our code works! But how can we actually check how it works? We’ll we can definitely import it into IRB and try it out with bundle exec irb:
irb(main):001:0> require 'dmp'
=> true
irb(main):002:0> Dmp.gen_passphrase
=> ["autopilot", "ivy", "overlay", "down", "visitor", "prenatal", "flirt"]
irb(main):003:0> Dmp.gen_passphrase(3)
=> ["roulette", "earthen", "garbage"]
irb(main):004:0> Dmp.gen_passphrase(6)
=> ["tartly", "happier", "juice", "itunes", "job", "eastward"]
You see? Now we can create a secure passphrase with our method. Let’s move onto the next test.
Checking passphrases with HIBP API
Let’s write the test of our method to check if a passphrase or password is vulnerable (read found in a dataset).
def test_vulnerable_pass
  # check_pwned should flag this password
  vuln_count = Dmp.check_pwned('passw0rd')
  refute_nil vuln_count
end
Let’s analyze the first piece of code.
vuln_count = Dmp.check_pwned('passw0rd')
It gets clearer if we read this code in reverse. We have the password 'passw0rd' that we want to check if it’s unsafe using the method check_pwned that belongs to the module Dmp and we want to hold the value or output of this action to the variable vuln_count. This output should tell us in how many datasets was the password found.
assert_nil vuln_count
As our password is not secure at all, then the value of vuln_count should not be nil, this is because we out method check_pwned should find the suffix of our hash in the HaveIBeenPwned (HIBP) datasets. With this in mind, we test the the value of vuln_count should not be nil with refute_nil. Let’s run the test.
NoMethodError: undefined method `check_pwned' for Dmp:Module
As there’s no method named check_pwned then our test complains, let’s open up the module dmp.rb and fill-out the code.
NoMethodError: undefined method `check_pwned' for Dmp:Module
No method? no problem, let’s fill it out in our module.
require "dmp/version"
# require SHA-1 digest and http utilities
require 'digest/sha1'
require 'net/http'
mod
module Dmp

  # -- CODE SNIPPED --

  def self.check_pwned(passphrase)
    # If the passphrase is an array generated by gen_passphrase we convert
    # the passphrase to an unified string, if it's a string already then
    # no changes are applied to the passphrase variable.
    passphrase = passphrase.join(' ') if passphrase.is_a?(Array)

    # We encode our passphrase to SHA-1, and save or prefix consisting
    # in 5 characters to the variable sha1_excerpt and the suffix to
    # the variable sha1_to_look_for.
    sha1_pass = Digest::SHA1.hexdigest(passphrase)
    sha1_excerpt = sha1_pass[0...5]
    sha1_to_look_for = sha1_pass[5..-1]

    # We make the API call with our SHA-1 prefix and store the response to
    # the variable api_request
    api_url = URI("https://api.pwnedpasswords.com/range/#{sha1_excerpt}")
    api_request = Net::HTTP.get(api_url)


    # The response is text instead of JSON, needs to format the response
    # to a dictionary so the rest of the hash can be located easier.
    # => String '0018A45C4D1DEF81644B54AB7F969B88D65:21'
    # => Array ['0018A45C4D1DEF81644B54AB7F969B88D65:21', ...]
    # => 2D Array [['0018A45C4D1DEF81644B54AB7F969B88D65', '21'], ...]
    # => Hash {'0018A45C4D1DEF81644B54AB7F969B88D65': 21, ...}
    striped_list = api_request.split("\r\n")
    pass_list = striped_list.map { |hash| hash.split(':') }
    hash_list = Hash[*pass_list.flatten!]
    hash_list[sha1_to_look_for.upcase]
  end
end
Now there’s a lot going on here, let’s simplify the steps:
- The passphrase should be a string, as in roulette earthen garbage”, but if the password was generated by
gen_passphrasethen it will return an array, only in that case we convert it to a string. - We use the digest module to convert our string to SHA-1, we save the 5 characters prefix to
sha_excerptand the suffix tosha1_to_look_for. - We perform a GET request to the API using the prefix of our hash. The response should be a text list as we saw previously.
- We have to format that list in a way that we can search for our hash suffix and have the value of how many times the password is found in datasets.
And this is the slightly tricky part, when we receive the response from the API, it doesn’t provide us with a pretty JSON response which we can work on, it provides us with a bare list like this:
003E7C1C94342454421573ADECD156C6AE8:2\r\n00A4DB094C56008C81D9DA2C55166F1A5BA:4\r\n00F042A842B821E2F727B0A4A3C0555E4A0:2\r\n01F14311110773C8064336D0D52736141D2:3\r\n01F6581B8152E00CBA4F8261335A78DA26F:1\r\n020290C96F182C924647A747F21681697B9:2\r\n02146D9588F55A6751CE580AA1AC6E16106:2\r\n02C2409C5E2AAC99D2937CAB31EB4677EAD:2\r\n02EFB814079D668ACF7308FAA18583D8CED:2\r\n033211C0B3B8B0EBC0BFDF2000CE0FFA166:1\r\n0378E7D9BC61CE282E9664D404505F66457:1\r\n03D801A3E713009943D0A76217278ABE2DD:3\r\n0412EEBFCB315371F4CDEAEB3AFDBEA43CD:1...
Pretty, right? (Sarcasm intended) now, I’m sure that there are better ways to convert this mess into a dictionary, but for clarity and brevity we will not get into a regex mind-boggling tricks right now. Let’s try this piece of code in IRB. First, let’s remove all the \r\n’s that we can find with striped_list = api_request.split("\r\n").
irb(main):009:0> striped_list = api_request.split("\r\n")
=> ["003E7C1C94342454421573ADECD156C6AE8:2", "00A4DB094C56008C81D9DA2C55166F1A5BA:4", "00F042A842B821E2F727B0A4A3C0555E4A0:2", "01F14311110773C8064336D0D52736141D2:3", "01F6581B8152E00CBA4F8261335A78DA26F:1", "020290C96F182C924647A747F21681697B9:2", "02146D9588F55A6751CE580AA1AC6E16106:2", "02C2409C5E2AAC99D2937CAB31EB4677EAD:2", "02EFB814079D668ACF7308FAA18583D8CED:2", "033211C0B3B8B0EBC0BFDF2000CE0FFA166:1", "..."]
Good, now let’s map that list and create a 2D Array:
irb(main):010:0> pass_list = striped_list.map { |hash| hash.split(':') }
=> [["003E7C1C94342454421573ADECD156C6AE8", "2"], ["00A4DB094C56008C81D9DA2C55166F1A5BA", "4"], ["00F042A842B821E2F727B0A4A3C0555E4A0", "2"], ["01F14311110773C8064336D0D52736141D2", "3"], ["..."],

# This individualizes our suffixes:
irb(main):011:0> pass_list[0]
=> ["003E7C1C94342454421573ADECD156C6AE8", "2"]
irb(main):013:0> pass_list[15]
=> ["04BC55FD524B3E42D6A732E2EA8076A9178", "5"]
Perfect… well not quite so, let’s create a dictionary out of the 2D array.
irb(main):014:0> hash_list = Hash[*pass_list.flatten!]
=> {"003E7C1C94342454421573ADECD156C6AE8"=>"2", "00A4DB094C56008C81D9DA2C55166F1A5BA"=>"4", "00F042A842B821E2F727B0A4A3C0555E4A0"=>"2", "01F14311110773C8064336D0D52736141D2"=>"3", "01F6581B8152E00CBA4F8261335A78DA26F"=>"1", "020290C96F182C924647A747F21681697B9"=>"2", "02146D9588F55A6751CE580AA1AC6E16106"=>"2", "02C2409C5E2AAC99D2937CAB31EB4677EAD"=>"2", "02EFB814079D668ACF7308FAA18583D8CED"=>"2", "033211C0B3B8B0EBC0BFDF2000CE0FFA166"=>"1", "0378E7D9BC61CE282E9664D404505F66457"=>"1", "03D801A3E713009943D0A76217278ABE2DD"=>"3", "0412EEBFCB315371F4CDEAEB3AFDBEA43CD"=>"1", "0422590C0BC43132207FF55FD78717074A4"=>"2", "04487E63244F1E2E868870AF5AE42ED8F1D"=>"2", "04BC55FD524B3E42D6A732E2EA8076A9178"=>"5", "051394B2B64EF899A10064E2A068924A46C"=>"2", "05AB0063CC2A0C1B857329D914932DF7C5B"=>"1", "06AD55DDE7997263212B916CDA2D9439924"=>"4", "083C47463AAF42031B31DDA54E2F68DC807"=>"1", "08765B6BDFAF683851AF48258A042D591C1"=>"2", "099FC9301DB35018687F5BEB5254530020A"=>"2", "09B30BF127F929D1D9CD946E84C7F7E8FBF"=>"4", "09D44DA6F15D940BFB19315A0C54CEAECBF"=>"5", "0A649886EE897919604D2D8F35384ECC90F"=>"3", "0C720EC0E1BED69EE7DE19C3EA4326E3DFF"=>"7", "0C9279D46756FDA6911146D2245A013C4F4"=>"3", "...",
Isn’t that better? Now we can search the suffix of our hash within the variable hash_list effortlessly:
irb(main):015:0> hash_list[sha1_to_look_for.upcase]
=> "216221"
It’s working! And right now that’s what we need to know, either way we can refactor it anytime later. Let’s load our module into IRB and let’s check some passwords.
irb(main):001:0> require 'dmp'
=> true
irb(main):002:0> Dmp.check_pwned('passw0rd')
=> "216221"
irb(main):003:0> Dmp.check_pwned('iloveyou')
=> "1593388"
irb(main):004:0> Dmp.check_pwned('coding dose dot com')
=> nil
As you can see, the password ‘passw0rd’ was found in 216221 dictionaries (or leaks), iloveyou was found in 1593388 and, fortunately, coding dose dot com was not found in any dataset, which makes it as secure against dictionary attacks at the moment.
Asserting secure passwords
This is the last test unit we’re going to perform here. More precisely we are going to check if a password is secure, we know that coding dose dot com is secure enough so we can test it and our gem should not flag this password as insecure. Let’s fill out the test right now.
def test_secure_pass
  # check_pwned should not flag this passphrase
  vuln_count = Dmp.check_pwned('iloveyou')
  assert_nil vuln_count
end
What we’re doing here is pretty much the same as with our previous test and the keyword refute_nil, but this time vuln_count should be nil because our secure password should not be found in any dataset on the HIBP API. Right now we want to see the test fail, so we have set the password as ‘iloveyou’.
$ bundle exec rake test

# --- SNIP ---

        Expected # encoding: ASCII-8BIT
        "1593388" to be nil.

# --- SNIP ---
There we see our test failing, now let’s make it pass changing the password to ‘coding dose dot com’ and we should see that our test pass without any issue.
$ bundle exec rake test

Started with run options --seed 24537

  4/4: [==========================================================================] 100% Time: 00:00:00, Time: 00:00:00

Finished in 0.53177s
4 tests, 6 assertions, 0 failures, 0 errors, 0 skips
Refactoring our tests
There’s one issue with our test that can be very easily fixed. Let’s take a closer look at the last test.
class DmpTest < Minitest::Test

  # -- CODE SNIPPED --

  def test_secure_pass
    # check_pwned should not flag this passphrase
    vuln_count = Dmp.check_pwned('coding dose dot com')
    assert_nil vuln_count
  end
end
If there’s one issue that bothers me, is that we’re not actually testing the core functionality of our gem. Why are we testing for a hard coded passphrase (‘coding dose dot com’) if our gem CAN generate one for us? We could even change our test like this and it could work perfectly fine!
class DmpTest < Minitest::Test

  # -- CODE SNIPPED --

  def test_secure_pass
    # check_pwned should not flag this passphrase
    safe_pass = Dmp.gen_passphrase(7)
    vuln_count = Dmp.check_pwned(safe_pass)
    assert_nil vuln_count
  end
end
This is perfectly fine, however, what about if we make more tests and we need to generate more passwords? We would have to generate a new passphrase in every test and this would affect performance and it wouldn’t be DRY code.
In order to avoid repetition and make our lives way easier, we can write a setup method, in which we can create an instance variable that holds our generated secure password, along with an insecure one, in order to reuse it in many tests.
class DmpTest < Minitest::Test
  def setup
    @unsafe_pass = 'passw0rd'
    @safe_pass = Dmp.gen_passphrase(pass_length = 12)
  end

  # -- CODE SNIPPED --

  def test_vulnerable_pass
    # check_pwned should flag this password
    vuln_count = Dmp.check_pwned(@unsafe_pass)
    refute_nil vuln_count
  end

  def test_secure_pass
    # check_pwned should not flag this passphrase
    vuln_count = Dmp.check_pwned(@safe_pass)
    assert_nil vuln_count
  end
end
Now if we run our tests everything should work correctly and we can reuse this passwords without having to declare them in each test.
Command Line Interface (CLI) and publishing our gem in RubyGems
Creating our CLI with Thor
Now that we have created the core functions of our gem, we can actually create a nice CLI interface. Luckily, this is made easier with the framework called Thor.
Thor is a toolkit for building powerful command-line interfaces. It is used in Bundler, Vagrant, Rails and others.
I invite you to go into the website and read a bit about Thor so you understand how the framework works, but don’t worry, it’s actually pretty simple and straight forward. To begin with, we’re going to create the file in which we’re going to construct our CLI.
# Create the filename cli.rb under lib/dmp/
$ touch lib/dmp/cli.rb
Now that we have created our file, let’s recall our project description:
- We want our gem to generate a passphrase.
- We want our gem to check this passphrase with the HIBP to test if it’s secure.
- And we also want an option to automatically copy this passphrase to the clipboard.
Ideally, we want to recreate this behavior:
$ dmp gen 4 --hibp --clipboard
- Passphrase: cobweb desolate pushy mulled
- Copied to clipboard.
- Password was not found in a dataset.
Now, I love colors in my terminal, so we’ll add colors to our output, in fact, I want to have every word in the passphrase with a random color. But let’s not get ahead of ourselves and add a little bit of code to our CLI to get started, open the file.
# lib/dmp/cli.rb

require 'thor'
require 'dmp'
require 'colorize'
require 'clipboard'

module Dmp
  class CLI < Thor
  end
end
This is the bare minimum that we need to get our CLI started, however, when we try to execute our gem in a terminal using bundler, it doesn’t detect it. This is because we need to define our executable file in our gem before we proceed.
# Create the file exe/dmp
$ mkdir exe
$ touch exe/dmp

# Make dmp executable
$ chmod +x exe/dmp
Please, notice that our dmp file does not have any extension, this is intended. Let’s open this file and fill it with some code.
#!/usr/bin/env ruby
require 'dmp/cli'


Dmp::CLI.start
In order for bundler to detect our new executable, we must integrate it into our version control with git.
$ git add .
$ git commit -am "Add CLI with Thor"
After that, let’s update our gems
# the command 'bundle' automatically updates and install your gems
$ bundle
Using rake 10.5.0
Using ansi 1.5.0
Using builder 3.2.3
Using bundler 1.17.2
Using clipboard 1.3.3
Using colorize 0.8.1
Using thor 0.20.3
Using dmp 0.1.0 from source at `.`
Using irb 1.0.0
Using minitest 5.11.3
Using ruby-progressbar 1.10.0
Using minitest-reporters 1.3.6
Bundle complete! 6 Gemfile dependencies, 12 gems now installed.
Use `bundle info [gemname]` to see where a bundled gem is installed.
And finally we can see that our CLI comes to life.
$ bundle exec dmp
Commands:
  dmp help [COMMAND]  # Describe available commands or one specific command
But we’re missing all the functionality that we want to create though, also there’s no description on what our program do, let’s try to fix this by adding a description and also three tasks to our CLI.
These tasks will be gen_pass which we’ll use to generate passphrases, check_pass that will check if a passphrase or password is found in a HIBP dataset and lastly an about task which will be used to describe information about the program and the author of it, alright? Let’s do it.
require 'thor'
require 'dmp'
require 'colorize'
require 'clipboard'

module Dmp
  class CLI < Thor
    desc 'gen [length]', 'Generate a passphrase of the desired length.'
    def gen_pass; end

    desc 'check', 'Check if a password/passphrase is vulnerable.'
    def check_pass; end

    desc 'about', 'Displays version number and information'
    def about; end
  end
end
Now, we have added empty tasks, and that’s O.K. for now, we will fill them one by one, but if we execute our gem we will see that new tasks were added.
$ bundle exec dmp
Commands:
  dmp about           # Displays version number and information
  dmp check           # Check if a password/passphrase is vulnerable.
  dmp gen [length]    # Generate a passphrase of the desired length.
  dmp help [COMMAND]  # Describe available commands or one specific command
Let’s code the task gen first. I want to add two options to the gen command, when I generate a passphrase of my desired length, I want to automatically copy the new passphrase to the clipboard, and also I want to check if the passphrase shows up in a HIBP database, which would make it insecure. We can add these optional functionality to our gen command using the keyword method_option.
require 'thor'
require 'dmp'
require 'colorize'
require 'clipboard'

module Dmp
  class CLI < Thor
    desc 'gen [length]', 'Generate a passphrase of the desired length.'
    method_option :clipboard,
                  aliases: '-c',
                  type: :boolean,
                  desc: 'Copy passphrase to clipboard.'
    method_option :hibp,
                  aliases: '-H',
                  type: :boolean,
                  desc: 'Check if passphrase is vulnerable in HIBP database.'
    def gen_pass(pass_length = 7)
    end
  end
end
We can see that we have added the option clipboard which will be activated using the alias -c, this option is boolean which will be treated as a flag and has it’s own description, the same goes to the hibp option. We can see this reflected when we check the help command in our gem.
$ bundle exec dmp help gen
Usage:
  dmp gen [length]

Options:
  -c, [--clipboard], [--no-clipboard]  # Copy passphrase to clipboard.
  -H, [--hibp], [--no-hibp]            # Check if passphrase is vulnerable in HIBP database.

Generate a passphrase of the desired length.
module Dmp
  class CLI < Thor
    # -- CODE SNIPPED --

    def gen_pass(pass_length = 7)
      # Force our length value to be an integer
      new_passphrase = Dmp.gen_passphrase(pass_length.to_i)

      # If our options :clipboard and :hibp are true, then proceeds
      # to copy the contents of the passphrase to the clipboard
      # and check if the passphrase is vulnerable.
      Clipboard.copy(new_passphrase.join(' ')) if options[:clipboard]
      dataset_count = Dmp.check_pwned(new_passphrase) if options[:hibp]

      # To add colors, first we store the available colors in a variable
      # but we eliminate the color black which makes some words to be
      # unreadable in the terminal. After that, we map the passphrase list
      # and assign a random color to each one of them.
      colors = String.colors
      colors.delete(:black) # black color looks ugly in the terminal
      new_passphrase.map! do |phrase|
        random_color = colors.sample
        phrase.colorize(random_color)
      end

      # We add default messages in case our options are activated. A green bold
      # message when the user wants to copy the passphrase, another one if the
      # passphrase is safe, and a red bold one if the passphrase is vulnerable.
      copy_msg = '- Copied to clipboard.'.bold.green
      vuln_pass_msg = "- WARNING: Passphrase appears in #{dataset_count} datasets!".red.bold
      safe_pass_msg = '- Password was not found in a dataset.'.green.bold

      # Bold the title passphrase and then join the passphrase to make it a string.
      puts '- Passphrase: '.bold + new_passphrase.join(' ')

      # If the clipboard option is active then display the clipboard message
      puts copy_msg if options[:clipboard]
      # If the option :hibp is True then check if the pass is found in a dataset.
      # If dataset_cout is not nil then display vuln_pass_msg, else display
      # the safe_pass_msg.
      puts dataset_count ? vuln_pass_msg : safe_pass_msg if options[:hibp]
    end

    # -- CODE SNIPPED --
  end
end
Looks a little bit long because all of the comments there, I only wrote them from clarity but you can leave them behind so you don’t have your code so cluttered. The good news is that we have completed our first task! It should be executed flawlessly. Let’s check it out.
$ bundle exec dmp gen
- Passphrase: molecular lubricate press net plank crook subpanel

$ bundle exec dmp gen 3
- Passphrase: preppy dividing epidural

$ bundle exec dmp gen 3 -c -H
- Passphrase: jaunt nurture reason
- Copied to clipboard.
- Password was not found in a dataset.

$ bundle exec dmp gen 1 -H
- Passphrase: capacity
- WARNING: Passphrase appears in 1879 datasets!
Awesome! Our gem works as expected, with all of the functionality we intended for it. Now, let’s fill out the next task, which would be check_pass. This task will not generate a passphrase, instead it will check for a password or passphrase that we currently have.
module Dmp
  class CLI < Thor
    # -- CODE SNIPPED --

    desc 'check', 'Check if a password/passphrase is vulnerable.'
    def check_pass
      puts "Enter your password, press ENTER when you're done."
      password = ask('Password (hidden):'.yellow, echo: false)
      (puts "Aborted.".red.bold; exit) if password.empty?


      dataset_count = Dmp.check_pwned(password)
      vuln_msg = "Your password appears in #{dataset_count} datasets!".red.bold
      safe_msg = "Your password was not found in a dataset.".green.bold
      puts dataset_count ? vuln_msg : safe_msg
    end

    # -- CODE SNIPPED --
  end
end
As we can see, this task is very simple and short, one thing that we can highlight is the fact that we can ask for a password without disclose it in the terminal, for security reasons of course. We can do this with the ask method followed by echo: false if we want to turn off the echo when people type in.
Now that our check_pass method is finished, let’s try it out on the console.
$ bundle exec dmp check
Enter your password, press ENTER when you're done.
Password (hidden): Your password was not found in a dataset.

$ bundle exec dmp check
Enter your password, press ENTER when you're done.
Password (hidden): Your password appears in 15996 datasets!
There we go! For the final task, let’s fill in the about task. For old times sake (and a little bit of cockiness) we’ll add a little banner when we call the about task.
module Dmp
  class CLI < Thor
    # -- CODE SNIPPED --

    desc 'about', 'Displays version number and information'
    def about
      puts Dmp::BANNER.bold.red
      puts 'version: '.bold + Dmp::VERSION.green
      puts 'author: '.bold + '@__franccesco'.green
      puts 'homepage: '.bold + 'https://github.com/franccesco/dmp'.green
      puts 'learn more: '.bold + 'https://codingdose.info'.green
      puts # extra line, somehow I like them.
    end

    # -- CODE SNIPPED --
  end
end
We can see that we display the banner first, and a few details about ourselves and the program there like version, homepage, author and you can add as much as you want. But we haven’t declared a BANNER yet. So let’s do that, shall we? Let’s open up our version file in lib/dmp/version.rb and add our banner there.
module Dmp
  VERSION = "0.1.0"
  BANNER = '''
 ____    __  __   ____
|  _ \  |  \/  | |  _ \
| | | | | |\/| | | |_) |
| |_| | | |  | | |  __/
|____/  |_|  |_| |_|
               '''
end
There we go, now let’s test our about task.
$ bundle exec dmp about
 ____    __  __   ____
|  _ \  |  \/  | |  _ \
| | | | | |\/| | | |_) |
| |_| | | |  | | |  __/
|____/  |_|  |_| |_|

version: 0.1.0
author: @__franccesco
homepage: https://github.com/franccesco/dmp
learn more: https://codingdose.info
Cool, right?! Now we have a fully functional gem! Let’s save our final changes into git.
$ git commit -am "Complete CLI tasks"
[develop ba6f18e] Complete CLI tasks
 2 files changed, 57 insertions(+), 4 deletions(-)
Managing versions with gem-release
I assume you’re going to refactor this gem, which you should do! There’s a lot of dirty code in it, right? I’m not doing that in this article though. But once you do, you will probably add more features or maybe remove some of them (like the colors for example), and when that happens, you would like to reflect this changes by bumping your version number.
I use the Semantic Versioning, you should check it out if you don’t know about it. If you made a change and you want to bump your version number, you would have to do it manually opening the version.rb file and then committing your changes. However, we can do this way more easily with the gem-release extension. Let’s install it right now.
$ gem install gem-release
Fetching gem-release-2.0.1.gem
Successfully installed gem-release-2.0.1
Parsing documentation for gem-release-2.0.1
Installing ri documentation for gem-release-2.0.1
Done installing documentation for gem-release after 0 seconds
1 gem installed
Now, I want to make a little change to our gem, I don’t want to write dmp gen each time I want to generate a new passphrase, I want it to do it by default! Luckily, we can do this with the keyword default_task. Let’s open up our CLI.
module Dmp
  class CLI < Thor
    default_task :gen_pass
    # -- CODE SNIPPED --
  end
end
Now let’s check and commit our change.
$ bundle exec dmp
- Passphrase: whinny capitol balsamic colt washout lend cradling

$ git commit -am "Add default task to CLI"
After we have committed our changes, we can go ahead and bump our version number. As we might know, we should bump a minor version as we added functionality to our gem.
$ gem bump --version minor

Bumping dmp from version 0.1.0 to 0.2.0
Changing version in lib/dmp/version.rb from 0.1.0 to 0.2.0

Staging lib/dmp/version.rb
$ git add lib/dmp/version.rb

Creating commit
$ git commit -m "Bump dmp to 0.2.0"
[develop b54f1f4] Bump dmp to 0.2.0
 1 file changed, 1 insertion(+), 1 deletion(-)

All is good, thanks my friend.
As you can see, the gem-release bumps our minor version and also commits our bump change in a single pass. After we have made all of our changes, it is a good idea to publish or gem so other people can download it and use it!
Publishing our gem
Publishing our gem its really easy. For this you should go to Rubygems.org and sign up with an email and password, as you will need to authenticate in order to manage your uploaded gems. Here’s how you do it.
# First we build our gem with our gem specifications
$ gem build dmp.gemspec
  Successfully built RubyGem
  Name: dmp
  Version: 0.1.0
  File: dmp-0.1.0.gem
After we have built our gem, it’s time to publish it.
$ gem push dmp-0.1.0.gem
Enter your RubyGems.org credentials.
Don't have an account yet? Create one at https://rubygems.org/sign_up
   Email:   gem_author@example
Password:
Signed in.
Pushing gem to RubyGems.org...
Successfully registered gem: dmp-0.1.0.gem
And that’s it! Your gem is available to the public, you can try this yourself by installing your gem hosted on the rubygems servers.
$ gem install dmp
Fetching dmp-0.2.4.gem
Successfully installed dmp-0.2.4
Parsing documentation for dmp-0.2.4
Installing ri documentation for dmp-0.2.4
Done installing documentation for dmp after 0 seconds
1 gem installed

$ dmp about
 ____    __  __   ____
|  _ \  |  \/  | |  _ \
| | | | | |\/| | | |_) |
| |_| | | |  | | |  __/
|____/  |_|  |_| |_|

version: 0.2.4
author: @__franccesco
homepage: https://github.com/franccesco/dmp
learn more: https://codingdose.info
EOF
This was quite a ride right? If you have any questions then let me know in the comments bellow. Thank you for reading this article and I appreciate your time and efforts if you have followed this tutorial.
You can checkout the code for DMP in the github repository here: https://github.com/franccesco/dmp And also you can check out the gem at RubyGems.org: https://rubygems.org/gems/dmp
If you feel that you need to rewrite the dirty code or make things your way, then who am I to stop you? Go do it! I’m sure you’ll do a hell of a job! :)