
I’m going to show you how to create a project page using the ever popular Jekyll and GitHub Pages so your projects can have a face, and of course, to show it of to your friends out there.
So, without further ado, we should get to the point already, shall we?
Building our site with Jekyll
Let’s say that you have a project called chuck-says that acts like a fortune cookie + cowsay whenever you call it in the command line.
To provide our repository with a project page, we can use Jekyll, which is a tool made in Ruby that can use a combination of Markdown and Font Matter to create static websites and blogs. It’s a very easy to use site generator that can aid us with what we want to accomplish in this case. We can install it using the gem command:
$ gem install jekyll
Now, let’s go to the folder in which our project is located. There, we can create our project’s page on the folder docs. There’s no need to create the folder as Jekyll can do this for us:
$ jekyll new docs
Running bundle install in /home/your_username/chuck-says/docs...
  Bundler: Fetching gem metadata from https://rubygems.org/...........
  Bundler: Fetching gem metadata from https://rubygems.org/.
  Bundler: Resolving dependencies...
  Bundler: Using public_suffix 3.1.0
--- SNIP ---
After that we can see our page structure, which can be something like this:
$ tree docs/
.
├── 404.html
├── about.md
├── _config.yml
├── Gemfile
├── Gemfile.lock
├── index.md
└── _posts
    └── 2019-06-09-welcome-to-jekyll.markdown
1 directory, 7 files
Here’s a brief description of each one of them, the bold one’s, such as config.yml and index.md are the ones that we’re actually going to use!
| File | Description |
|---|---|
| 404.html | Not Found template |
| about.md | A short about page |
| config.yml | Configuration file |
| Gemfile | Dependency gem requirements and configuration |
| Gemfile.lock | Pinned gem versions |
| index.md | Front Page (And the one we’ll use!) |
| posts/ | Folder containing blog posts (we won’t use them!) |
As we’re not trying to create a blog (we can see how to do it on a another post), we can remove about.md and the posts/ folder.
Before we move on, there’s something important we need to do first! We have to add the github-pages gem, provided by GitHub, in order to have access to themes and to ensure maximum compatibility to make our site deploy on GitHub Pages. Let’s open up Gemfile and add the gem as follows:
# Main dependencies and group definitions
source "https://rubygems.org"
gem "jekyll", "~> 3.8.5"
gem "minima", "~> 2.0"
group :jekyll_plugins do
  gem "jekyll-feed", "~> 0.6"
end
gem "tzinfo-data", platforms: [:mingw, :mswin, :x64_mingw, :jruby]
gem "wdm", "~> 0.1.0" if Gem.win_platform?

# Add the GitHub Pages gem
gem 'github-pages', group: :jekyll_plugins
Now, let’s update our packages:
# Remember to to this inside the /docs folder
$ bundle update
Fetching gem metadata from https://rubygems.org/..........
Fetching gem metadata from https://rubygems.org/.
Resolving dependencies...
Using concurrent-ruby 1.1.5
...
Bundle updated!

$ bundle install
Using concurrent-ruby 1.1.5
Using i18n 0.9.5
...
Bundle complete! 5 Gemfile dependencies, 85 gems now installed.
Use `bundle info [gemname]` to see where a bundled gem is installed.
To ensure that we can run our page, let’s serve it locally with the serve or s subcommand:
$ bundle exec jekyll serve
Configuration file: /home/your_home/workspace/chuck-says/docs/_config.yml
            Source: /home/your_home/workspace/chuck-says/docs
       Destination: /home/your_home/workspace/chuck-says/docs/_site
 Incremental build: disabled. Enable with --incremental
      Generating...
       Jekyll Feed: Generating feed for posts
                    done in 0.111 seconds.
 Auto-regeneration: enabled for '/home/your_home/workspace/chuck-says/docs'
    Server address: http://127.0.0.1:4000/
  Server running... press ctrl-c to stop.
There you go! You can now visit http://127.0.0.1:4000/ to see your Jekyll web page up and running!
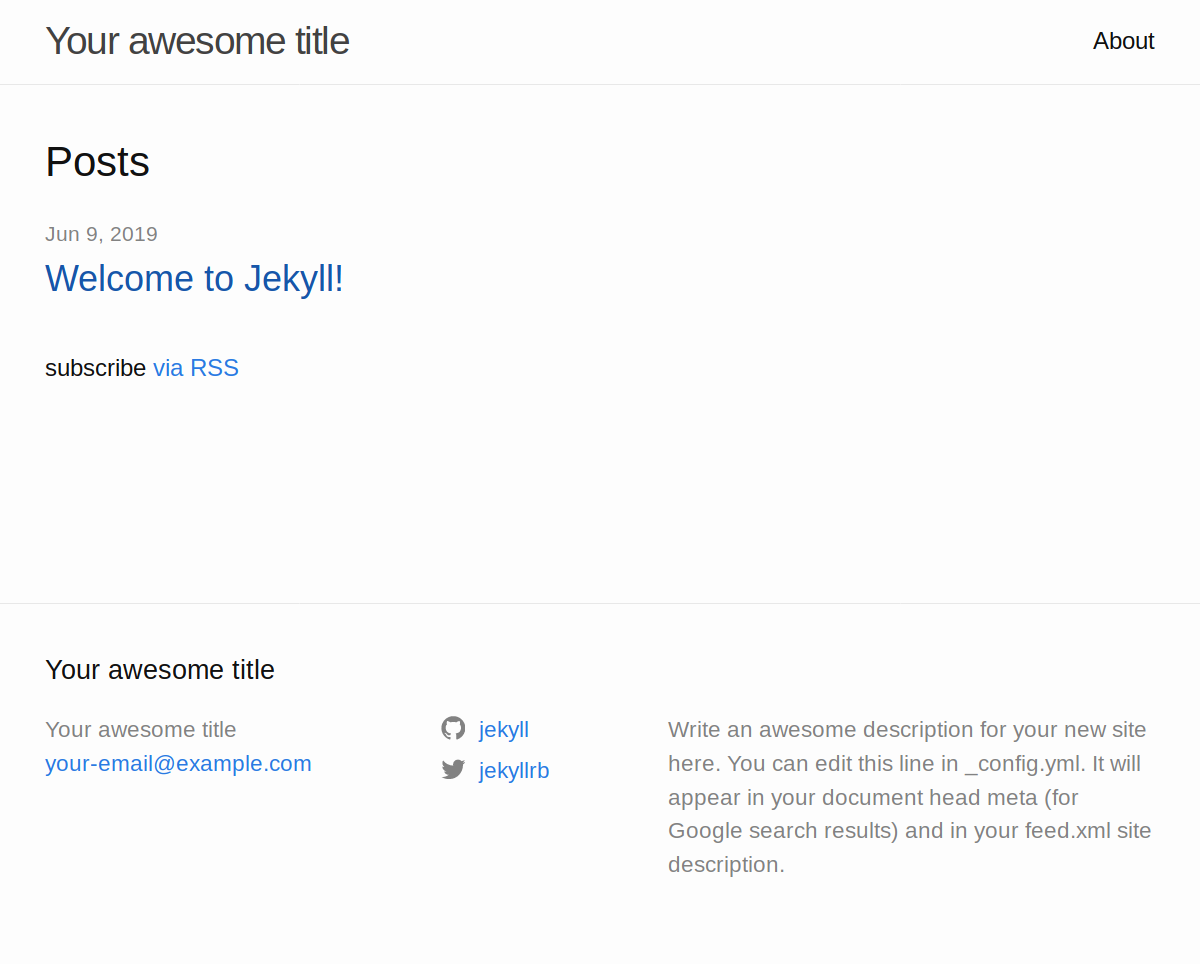
Now this is great, but this looks like a blog, and we’re not trying to make a blog here, we have to perform a few tweaks to get our one-page project website come to life.
Configuring Jekyll
We got our site up and running, which is awesome, you can make blog posts! But we’re not looking for that. Instead, we want to create a one-page site for our project.
To achieve this, we’re going to open up _config.yml and make a few changes, as well as changing the main theme. We will want to apply the Cayman theme for our site. Here’s the configuration file:
title: Your awesome title
email: [email protected]
description: >- # this means to ignore newlines until "baseurl:"
  Write an awesome description for your new site here. You can edit this
  line in _config.yml. It will appear in your document head meta (for
  Google search results) and in your feed.xml site description.
baseurl: "" # the subpath of your site, e.g. /blog
url: "" # the base hostname & protocol for your site, e.g. http://example.com
twitter_username: jekyllrb
github_username:  jekyll

# Build settings
markdown: kramdown
theme: minima
plugins:
  - jekyll-feed
We will want to change these variables, more importantly, the baseurl. For GitHub projects, your baseurl will be your repository name. If you change your repository name in the future, then remember to edit this line! Let’s make our changes:
title: Chuck Says.
email: [email protected]
description: Replace weak fortune cookies with all-mighty Chuck Norris facts.
baseurl: "/chuck-says" # the subpath of your site, e.g. /blog
url: "" # If you have a domain name, then you should fill this out!
twitter_username: __franccesco
github_username:  franccesco

# Build settings
markdown: kramdown
theme: jekyll-theme-cayman # << Set the Cayman theme!
plugins:
  - jekyll-feed
That was fast, right? But before we move on, it’s time for us to update the layout in our index.md file. You see, Jekyll works using a pre-defined layout that wraps the page in it, these are defined in the directory _layouts in a HTML file, luckily they are added automatically in the github-pages gem, so you won’t have to create one.
Let’s add the default layout to our index.md page using Font Matter. Let’s open it up and change the format; After that, we can finally fill out our page!
---
# You can copy and paste your `README.md` contents, or write something else!
# Feel free to use your imagination here, just remember to respect the font matter division (`---`).
layout: default # << Change this line from 'home' to 'default'
---
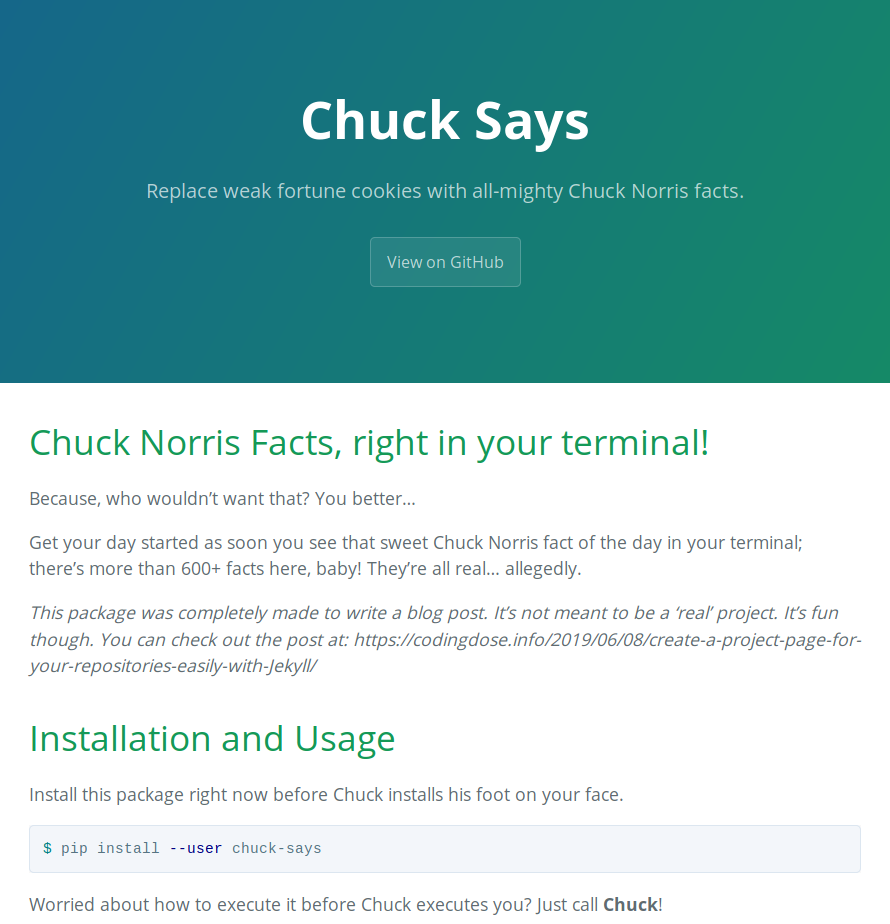
Chuck Norris Facts, right in your terminal!
Because, who wouldn't want that? You better...
Get your day started as soon you see that sweet Chuck Norris fact of the day in your terminal; there's more than 600+ facts here, baby!
They're all real... allegedly.
--- SNIP ---
Deploying our site with GitHub Pages
After you have pushed your /docs folder to your repository with all of the changes we previously made, let’s configure GitHub so it can deploy our site. Fortunately, this is very easy.
- In your GitHub repository, click the Settings tab.
- Scroll down until you see GitHub Pages.
- Click the button under Source and select master branch /docs folder
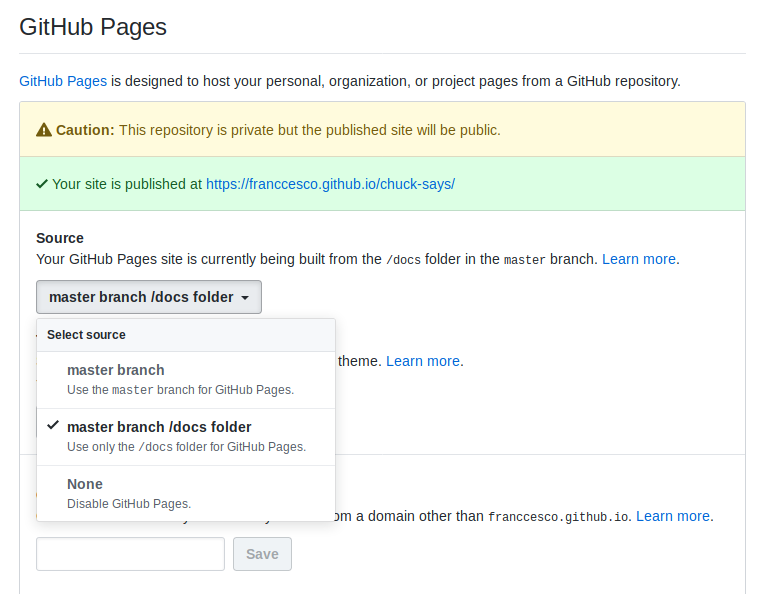
After that, you should see Your site is published at https://yourusername.github.io/your-project/, it may take a few seconds to appear.
After you have applied the settings, you should be able to check out your new project site at the URL that GitHub provides you.
Conclusion
Jekyll is a very powerful site generator. You can use it to make a blog, a CV online, your project’s sites, and it doesn’t cost a dime to host it at GitHub pages! Here’s an example of how it looks: https://franccesco.github.io/chuck-says/
Pretty neat, right? You can check the example repository by clicking on the image. Also, if you’re new and you would like to make your first contribution in the GitHub community, check out the issues pages.
I think I’ll make a post on how to create a blog using Jekyll, but we will also check out other static sites generators too. I hope you really liked the post, if you have any question then don’t hesitate to let me know.